2.
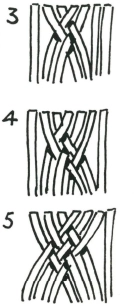
Now take the next strand to the first one and weave it under and over as in Fig. 3.
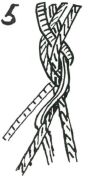
Weave the next strands from left and right alternately towards the centre as in Fig. 4, 5, 6.
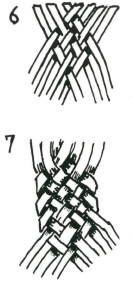
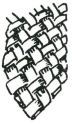
The finished plait should be tight and close as in Fig. 7.
TO FINISH OFF
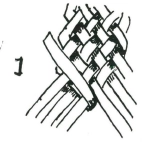
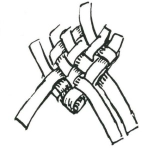
Take one of the centre strands, and lay it back upon itself as in Fig. 1.
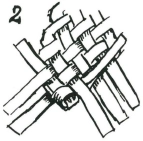
Now take the first strand which it enclosed in being folded back, and weave this back upon itself as in Fig. 2.
Take a strand from the opposite side, and lay it back and weave it between the strands already plaited.
All the strands should be so woven back that no strands show an uneven pattern, and there should be a regular under-over-under of the alternating weaves.
If you have plaited tightly there may be a difficulty in working the loose ends between the plaited strands.
This can be done easily if you sharpen a thin piece of wood to a chisel edge, and use this to open the strands sufficiently to allow the ends being finished to pass between the woven strands.
Roll under a bottle to work smooth after finishing off.
ROUND OR LARIAT PLAIT . . . FOUR STRANDS

1. Lay the four strands together side by side, as in Fig. 1, and cross the right-hand centre strand over, and then around the left-hand strand.
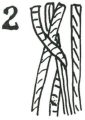
2. Take the left-hand outside strand, and pass it over the two crossed strands, and then under the right-hand one of the two, so that it is pointing towards the left, as in Fig. 2.
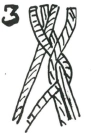
3. Take the free right-hand strand, and pass it over the two twisted strands to the left and completely round the left-hand one of the two, as in Fig. 3.

4. Repeat this with the outside left-hand strand as in Fig. 4.
5. Repeat with the right-hand strand as in Fig. 5.
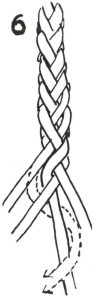
6. The finished plait should look like this.
CLIMBING WITH FOOTLOCK
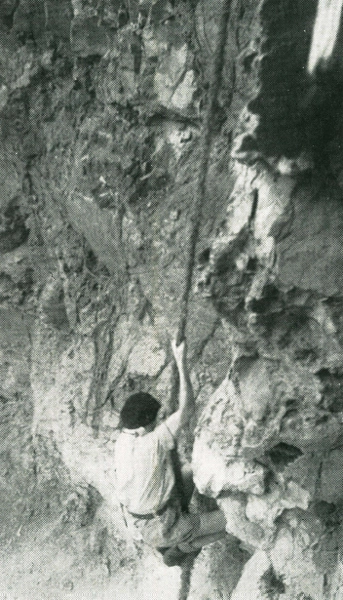
Ascent of a cliff face, using a footlock on a grass rope. The grass rope was 3 strand 3 lay of 2 inches diameter.
CAUTION
Prior to trusting your life to a bush-made rope, always test it. Tie one end to a tree and put three or four fellows onto the other end. Have them take the strain gently until finally all their weight is on the rope. If they cannot break it, then it is safe for one man at a time to use it to climb or descend a cliff face.
When climbing up a bush-made rope always use the footlock, and when descending never slide down the rope. Climb down again using the same footlock.

The footlock offers a measure of safety, and the climber is so secure that he can actually stand on the rope and rest without his body weight being carried entirely on his arms. To prove this, use the footlock, and clasp the rope to your body with your arms. You will find that you are ‘standing’ on the rope and quite secure.
By means of the footlock you can climb to any height on the rope, stopping to rest when your arms tire.
The footlock is made by holding onto the rope with both hands, lifting the knees, and kicking the rope to the outside of one foot. The foot on the opposite side to the rope is ‘pointed’ so that the toe picks up the rope, which is pulled over the foot which was against the rope, and under the instep of the foot which ‘picked’ it up.
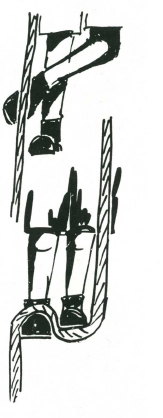
The two feet are brought together, and the rope is now over the instep of one foot, and under the ball of the other. Then, to secure the grip, and lock the rope; the feet are placed one on top of the other so that the rope is clamped down by the foot on top.
By straightening the knees, and raising the hands, the body is lifted, and a fresh grip taken for the next rise.
In descending, the body is bent, the hands lowered, and the footlock released, and a fresh grip taken with the feet at a lower level on the rope.
It is advisable to wear boots or shoes when climbing bush-made ropes.
This method of descending is much safer than sliding. In sliding there is grave risk of bad rope burns to hands and legs.
‘ABSYLE’ FOR ROCK DESCENT
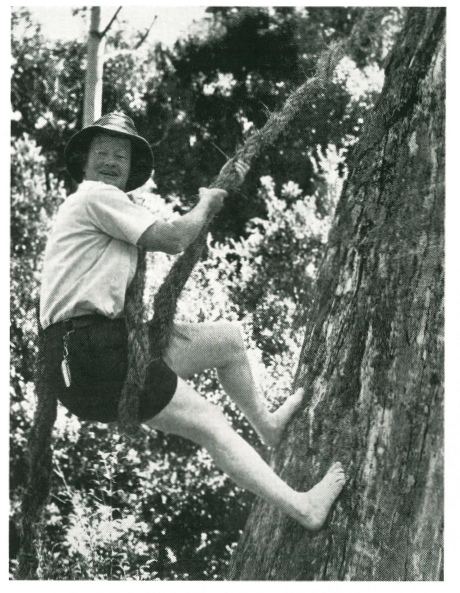
Photo with acknowledgment to “S.M.
1 comment